Showing posts with label DIY. Show all posts

Thursday, 2 January 2014

Oh my Pistachio!

It's been a while but it took some time for me to get my inspiration back. And while I have been absent I haven't been doing nothing. I have actually been busy with projects I really want to share with you. To be honest I do not expect to be blogging on a regular basis, but only when I really feel like it and when I want to share my idea's/thought and projects with you. Hopefully that is okay....

So let's start with one of the most amazing DIY projects I have done so far. A DIY Necklace made with pistachio's! Not the actual nuts but the shells.


Saturday, 1 June 2013

How to pimp a t-shirt? DIY

Last Wednesday my little niece (the cutes niece ever) celebrated het first birthday! And since I am her favorite aunt I had to make something special for her.

I already bought a present for her but I also wanted to make something unique for her. So what I did is I bought some Iron applications and 2 shirts and made something pretty cool for her to wear. 

Here we go!


Thursday, 30 May 2013

Craft Challenge May: Wall Art


Finally I found the time to show you my project for this month's Craft Challenge! I already finished it last week (yes that's right! It wasn't last minute work this time) and I must say I am pretty pleased with it.

Like my previous projects this one is also very affordable and it can be made in an afternoon.


Saturday, 11 May 2013

DIY: Multi-colour scarf

A while ago I made this colourfull shirt for which I used some left over fabric. Since I still had some fabric left I decided to make a scraf. 

Below you can find a description on how to make one for yourself.

1). What do you need:

  • Fabric 80x140cm
  • Ribbon 40 cm long (2x 20cm)
  • Sewing machine
  • needle + thread


Monday, 22 April 2013

Fresh start of the day - Deluxe

A think you probably don't know about me is that my dream is to one day open my own sandwich shop or lunch room.....

So when ever I have the time I make my boyfriend a nice sandwich that I came up with as a test case. And today I am going to share one of those test cases with you. Here is the sandwich that I made yesterday:

Fresh start of the day - Deluxe:


  • Italian bread roll. (Here in Holland we have all sorts of bread rolls! This one is white bread with Italian Herbs in it. You can just buy it at a local backery of grocery shop.)
  • Yoghurt based mayonaisse
  • Cucumber
  • Tomatoes
  • Cheese
  • Avocado
  • Boiled egg
  • Some thinly sliced bacon
Just put it on the roll in this order and you have this result:


Smakelijk eten! Which is Dutch for Bon Appetit!

post signature

Thursday, 18 April 2013

April Craft Challenge 2013 - Vintage Hat Rack


So are you ready for my masterpiece?

 Well before you get all excited I must admit one thing... well actually two things...

1) I spent € 10 instead of $ 10... so basically I overspent € 3....

2) My dad helped me.... well actually he made the whole thing.... It went like this: I brought the knobs to my parents to show my plan and to ask how to do it and if I could use his drill. So I decided to leave my stuff at my parents for when I would come back to make it. And before I knew it my dad finished the whole project....

To be honest I am gald he did, because it looks amazing and perfectly finished! A real masterpiece if you ask me.


I hope you like it as much as I do!


post signature

Sunday, 24 March 2013

Craft Challenge March!

It is almost the end of March and therefore it is time to show you what I made for this month's Craft Challenge.


I like to make easy, simple things that basically everybody can make without spending too much money.

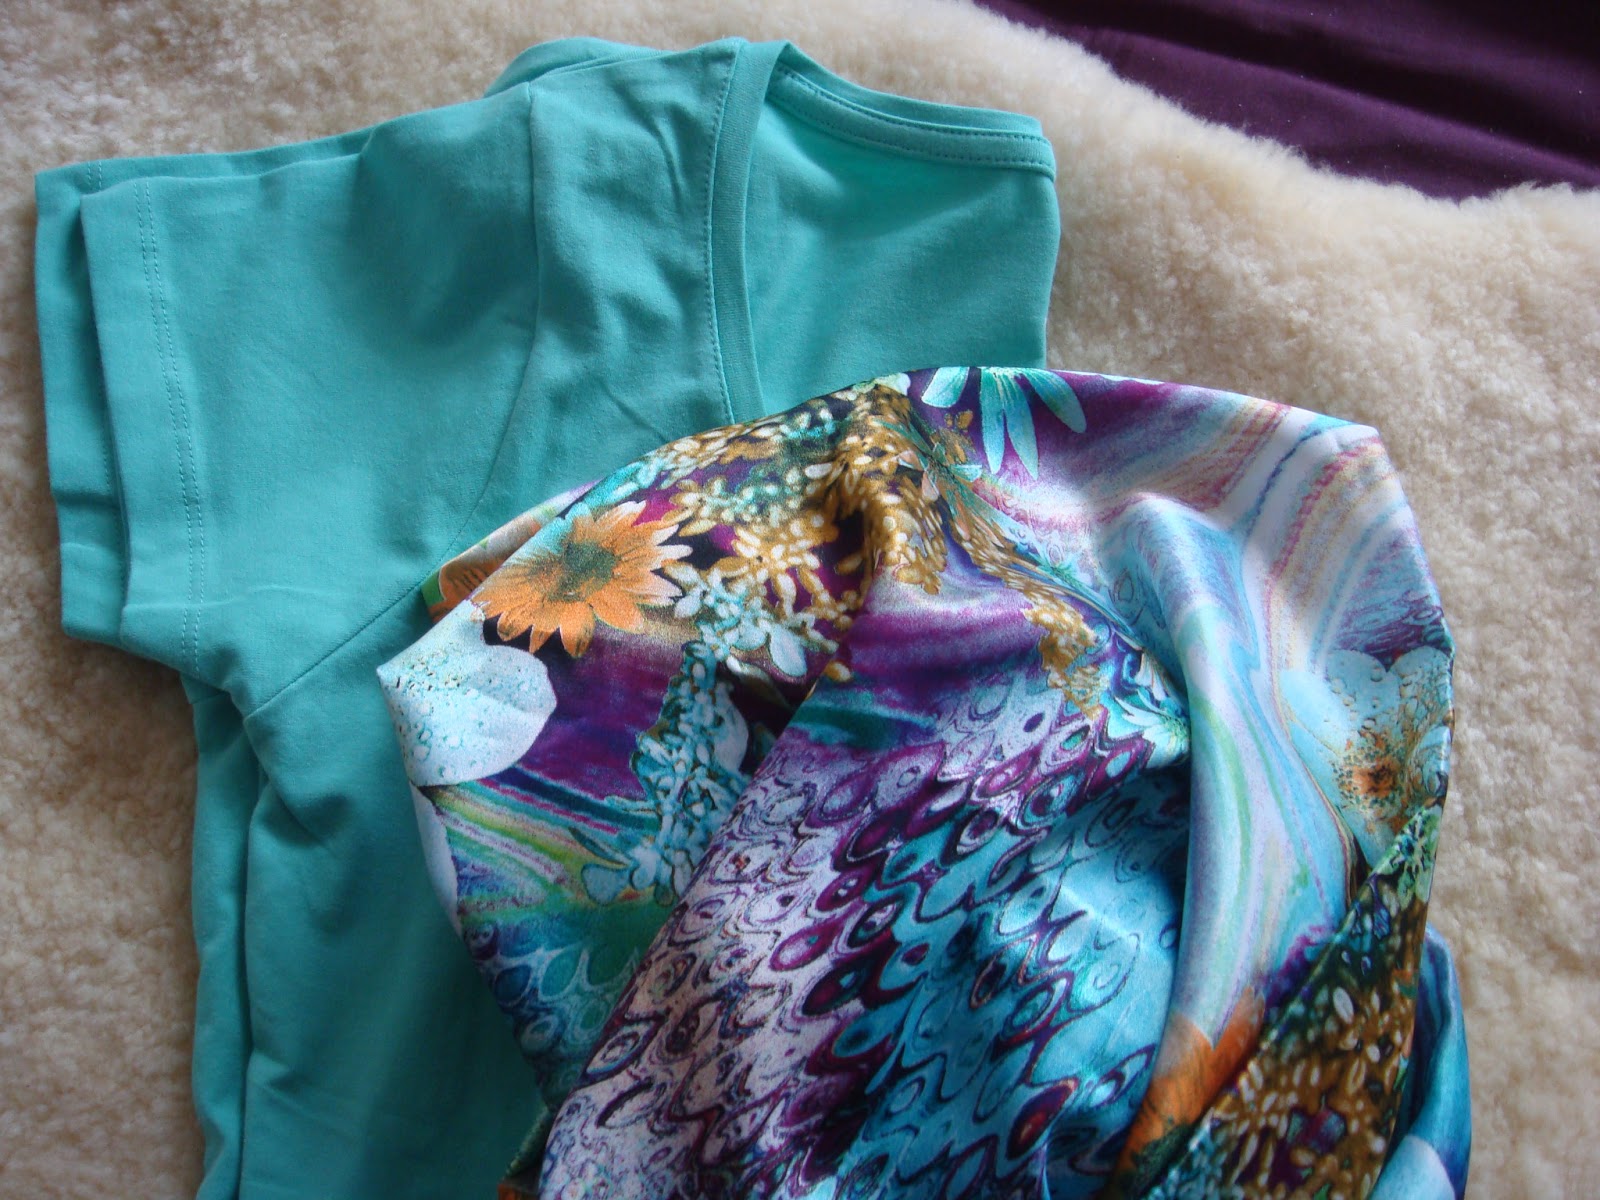
For this challenge all you need is a basic t-shirt, I bought mine for only € 2.99 at Zeeman. The shirt is very affordable and also very comfortable! The fabric panel I used was something I had as a left over from last season.

  You just need to cut the panel in line with the shirt, but keep in mind you need to stretch the bottom of the shirt all the way out. This is the width of the panel you will need, then you just cut a square. You first finish of the top part of the panel with a small zig-zag stitch or an over-lock stitch. Then you crinkle/wrinkle the top part about 5 cm below the top. Once you have done this you can stitch the sides to the shirt and finally the bottom. It is pretty easy but you do need a sewing machine...

And here is the result!


I wanted to post a picture of me wearing the shirt with a cute outfit, but my boyfriend is in Sweden for a conference so there is no one to take cute pictures. But once I have cool pics I will be sure to post and share them with you!

Enjoy the rest of your weekend!

post signature

Tuesday, 19 March 2013

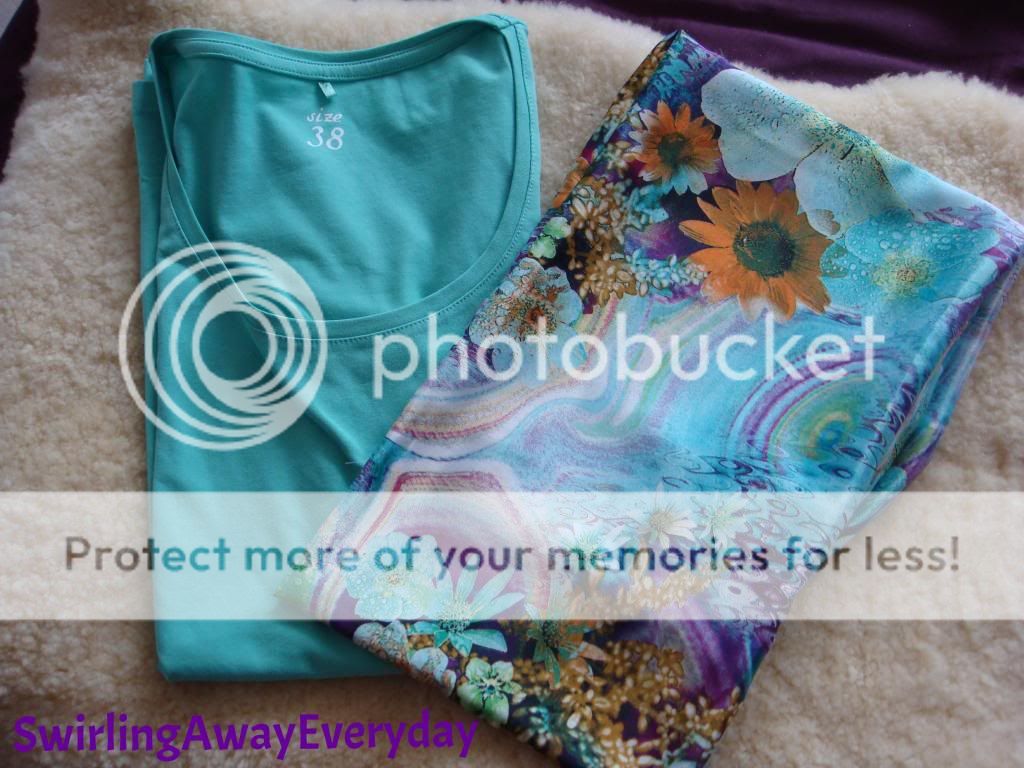
March Craft Challenge Teaser!

So I this weekend I started preparing my March Craft Challenge. As you probably know I am participating in Rosie's 2013 Craft Challenge. If you are new or are not sure what I am talking about, just click here, here and here to get all the details. The complete overview of all our challenges  can be found below:


As you can see for March we have to make something cool to wear. It can be anything! I started my project but since it is not yet ready I decided to post a little teaser so you can get an idea of what I am making.


What you will need is a simple t-shirt and some nice, colorful, bold printed fabric.


Curious?! Well stay tuned because later this week I will give you the complete scoop on this project.
 post signature

Saturday, 16 March 2013

Market 2 Market

And I am back!!! I have been so busy that I just could not find the time and energy to write new posts and let you know what's going on.

2 weeks ago I started a new job. And with a new job come a lot of new impressions, new people to get to know and new tasks I have to make my own. So you can imagine I was totally worn out every evening after I came home. 

Besides this I also had some busy weekends all packed with fun stuff to do! The 2 most important things were my visit to the IJhallen in Amsterdam with my friend Amy from Amy's Fashion Scrapbook. This is like basically a huge monthly flee market mainly indoor. 

http://www.ijhallen.nl/index.php
The reason went there is because a lot of people go there to sell old clothes, and we needed to investigate the location to see if it would be something for us to sell our clothes.... and believe me when I say we have loads of clothes to sell!

And last weekend I went to the Stoffenspektakel with my mother in law. And no this is not a typing error... I actually get along very well with my mother in law! She is the person that inspired me to start making my own clothes and other DIY stuff. The Stoffenspektakel is a yearly indoor market where they sell all sorts of fabrics and fournitures. And with all sorts of fabrics I really mean all sort of fabrics, from affordable to the real A-brand fabrics (Chanel, Armani) and also real leather and fur.


When you are a regular visitor you will probably know that, when I have time I like to make my own clothes. But since it is pretty time consuming I don't make things as often as I would like..... Below you can find an overview of the lovely fabrics I bought.


For Some of the fabrics I already know what I want to make but for some I am not sure yet... A few questions for my lovely readers:

1) which one do you like best?
2) any ideas as to what I should make?

Once I have finished an item I will be sure to put them online so you can be the judge of the end result.

Enjoy your weekend and see you soon!

post signature

Thursday, 28 February 2013

Blog Angel Reviel post February

Are you a blogger? Do you want to help other bloggers? Do you want to share your amazing stories with other bloggers? Do you want some support with your blog? 
 If your answer to all these questions is YES you are the perfect Blog Angel Candidate!!! Because this is what being a Blog Angel about!

CraftboticBlogAngel

This was the first Blog Angel round for 2013 and we had to choose our blog. So I decided to go for Anja from Cocalores. Besides being an amazing blogger she has also become my German Blog Friend which is amazing! Oh and she also loves PINK so what what's not to like?!

Cocalores

So what did I do to help her out:

- I started following her on Pinterest, and since I really loved a lot of her Pins I made a post about her Pinterest boards hoping she would get more Pinterest followers. You can read the post here.

- Of course I did the regular commenting, since I already was a daily reader of her blog I had hoped that this wouldn't raise too much suspicion about me being her Angel.....

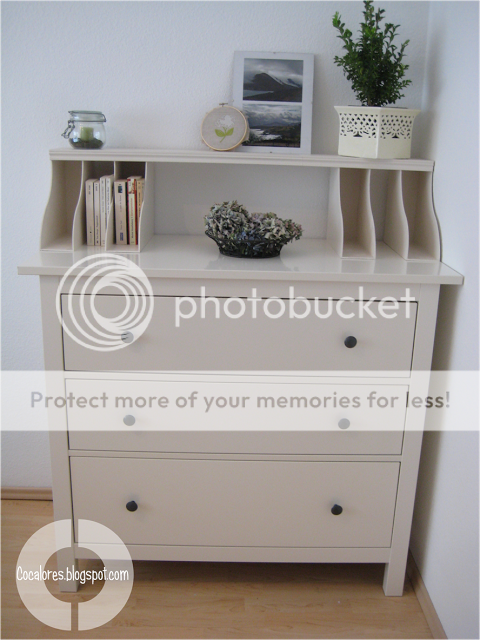
- Beside being a Blog Angel I am also participating in the Craft Challenge 2013 and so is Anja! So I also wrote a post on her amazing February DIY project in which she transformed a basic Ikea dresser (I have the very same dresser) into something special. You can read about it here and here.

- We also had great email conversations about our blogs and things we read! Which is always nice.

My goals for her was to attract some new readers and followers on Pinterest, and I hope I made that happen. But besides helping her I also gained a great friend which being a Blog Angel is all about.

So what are you waiting for?!

Go over to Craftbotic, start reading about our Blog Angel Society and get in contact with Rosie so you can also be a Blog Angel the next round!


post signature

Friday, 22 February 2013

DIY dresser transformation!


If you like a challenge you should definitely join the Craft Challenge 2013 hosted by Rosie from Craftbotic.


I decided to participate because all the challenges are free for interpretation and require creativity! They do not only require creativity because you have to come up with something awesome every month, but also because the participants make the most amazing things!!! My January challenge was pretty awesome I thought... until I saw all the creations of the other participants. The same goes for this months challenge. I haven't started mine yet but the plan and materials are on site! But when I saw the below item... I am starting to doubt my idea... It is probably way too simple... But I will just go with it and maybe I will amaze myself and all my readers!

Anyway here is the item I am loving at the moment the most! It is pretty amazing and I also think it is affordable and easy to do.


So what is the challenge, what did Anja from Cocalores do with this dresser? Below you can find a short guide on how to transform your dresser into something new.

1) You need to buy these:


2) Start gluing:


3) Placement:


4) Paint it in your favourite colour and your will have this amazing transformed dresser!


Are you impressed?! I for sure am! To read the complete DIY handguide to this cool project click HERE.


Friday, 8 February 2013

Swirling Cameleon


I thought it was time to do a little update on the lay out of my blog. What I wanted to do for a while now is using the button Rosie from Craftbotic made for me in the header. So I did a little DIY Blog Metamorphosis

And the result is somewhat different... To be honest I have to get use to the new lay out, but I quite like it. It is more playful, softer and cuter. But I am not yet sure if maybe it comes off as... a bit childish... too happy.... Well I will leave it like this for now and see if I can get used to it... If not I might change it back as it was.

What do you think? Is it a change for the better or did you like the old lay-out? Or do you have an idea on the header of my blog? I would love to hear your input!


Thursday, 17 January 2013

2013 Craft(botic) Challenge

A Challenge?! Yes that is that the title of this post is! And this challenge sound pretty awesome! If you are a regular reader you might know that I am not that good at sticking to challenges.... I once tried the photo-a-day challenge... during which you had to take a photo of an item (which was mentioned on the blog) and post it.... half way the month I forgot to take the pics... and I just stopped.... If you also remember I said I would participate with the weekly OH, How Pinteresting item... couldn't keep up with this either...

But a new year has started so it is time to make new resolutions right?! The thing about this challenge if that you only have to do 1 item per month! So you have 4 weeks and weekends to make something. And I like making things and think of making things.... to sit behind my sewing machine and see how you create something. So will I keep up... I think so!

This is what the challenge consists of:


So for January we have to make something of leftovers! And boy do I have leftovers... My first thought was to use my fabric leftovers, but of course you can use anything you like; paper, flowers, fabric, wood, food! Anything you like!

And here is the first item of the challenge: I made a Tissue Case! I did use a tutorial so I am not sure if that is cheating... so please don't Rosie from Craftbotic the host of this challenge! The tutorial I used is from Very Purple Person. And to be honest I quite like the result! It is very easy to make, useful and you don't need a lot of fabric.

Well if you want to join in on the fun, it is easy! No signing up, just crafting!

Signature to use

Friday, 14 December 2012

Crafts & Christmas part II

Here is the deal on the Cocalores Tutorial I "followed".

So I am going to be a bit lazy and only post pictures of the end result and for the complete tutorial I would advise you to click HERE.

My end result:


Ok... so I am pretty happy with the end result, but to be honest I think I might add some more balls because I think there is still much white of the Styrofoam peeking through..... Will do that this week!

So what did this DIY project cost me: about € 15, that is including the balls, the Styrofoam and glue gun (which I bought at a craft store). Of course this is excluding the additional balls that I need to buy to perfect this piece.

If you also have some Cute Handmade (Christmas) Gifts you can upload them HERE!

Have fun!!!!
Signature to use

Wednesday, 12 December 2012

Crafts & Christmas


Crafts and Christmas are always a good combination! And this weekend I had such a creative weekend! Pfff I can't even believe it myself.

What did I do this weekend:

1) transformed my lovely Magnolia branches from a summer piece to a Christmas piece.


Before
After
I still had a voucher of a garden center where there is a huge Christmas market each year! The deal on the voucher was that is cost € 10 but was worth € 20! So I bought some items to make my perfect Christmas piece! I also found some old items (that happened to be red and purple) and voila!

So here we go! What do you need:
- some branches, I used these Magnolia branches that I already had but pine branches would also be a good option
- a nice vase
- some silk or real flowers and Christmas ornaments.
- clip on flowers
- berry branches
- stars
-Christmas balls
- Orchids
- beaded pendulum
- small ribbons
- candle holder
- some voile or large ribbon in order to make sure there is no gab between the vase and decoration. So basically you use it as stuffing...
- and you will need some Styrofoam or floral foam to fasten everything

How to start:

1) put the foam in the vase, quantity depending on the diameter of the vase
 
2)cover the vase with voile (I laid the branches on top of the vase instead of putting them into the foam. If you want to put the branches vertical you will need to fasten them into the foam and therefore cover the vase with voile at the end)


3)wrap the beaded pendulum around the branches

 
4) fasten the flowers and berry branches


5) Once you have done this you can start adding the other ornaments and 
ribbons for the final touch! (An other nice idea is to wrap some yarn/threat around the branches, the rougher the yarn the cooler. This was also use in the "before" picture).


Well basically this is it! Most important is that you make a plan before you start and buy the ornaments based on your plan, and once you start it is pretty easy!

  2) I made this super cool Christmas ornament for which I used the tutorial from Cocalores! Below a preview, the complete post will follow later this week.


3) On Sunday I made a lovely top! The complete story will follow in another post but below an idea of the top I made.


Stay tuned for the whole deal! See you soon!

Signature to use