Showing posts with label crafts. Show all posts

Tuesday, 26 February 2013

Craft Challenge 2013 - My Repurposed Crafts!

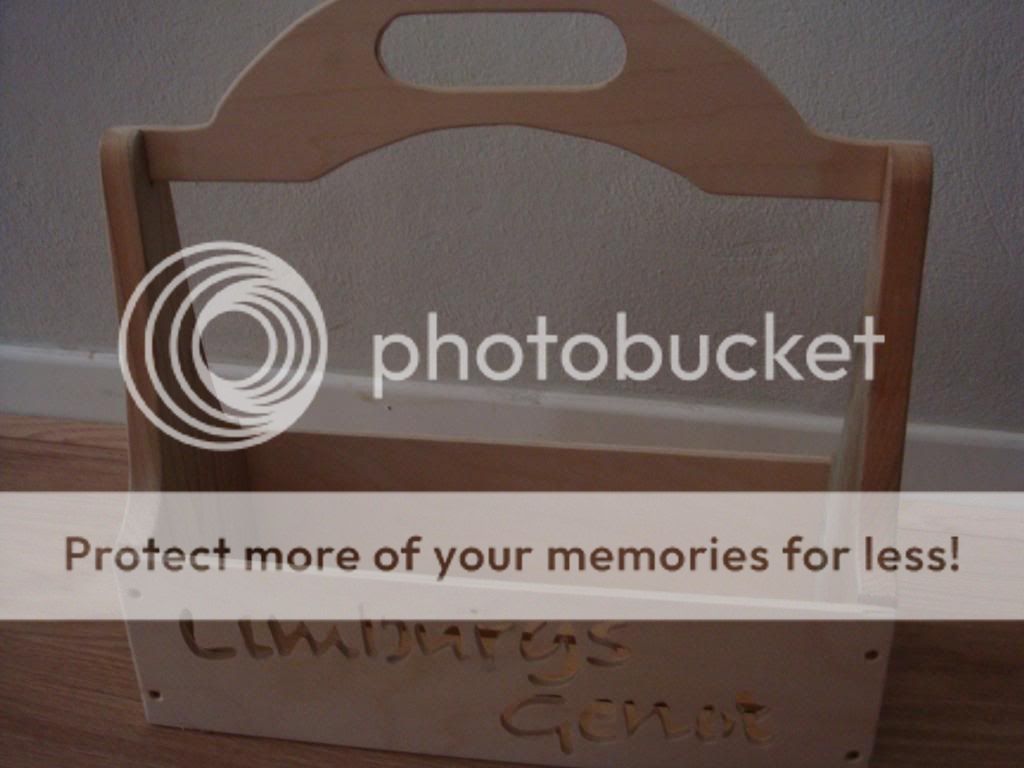
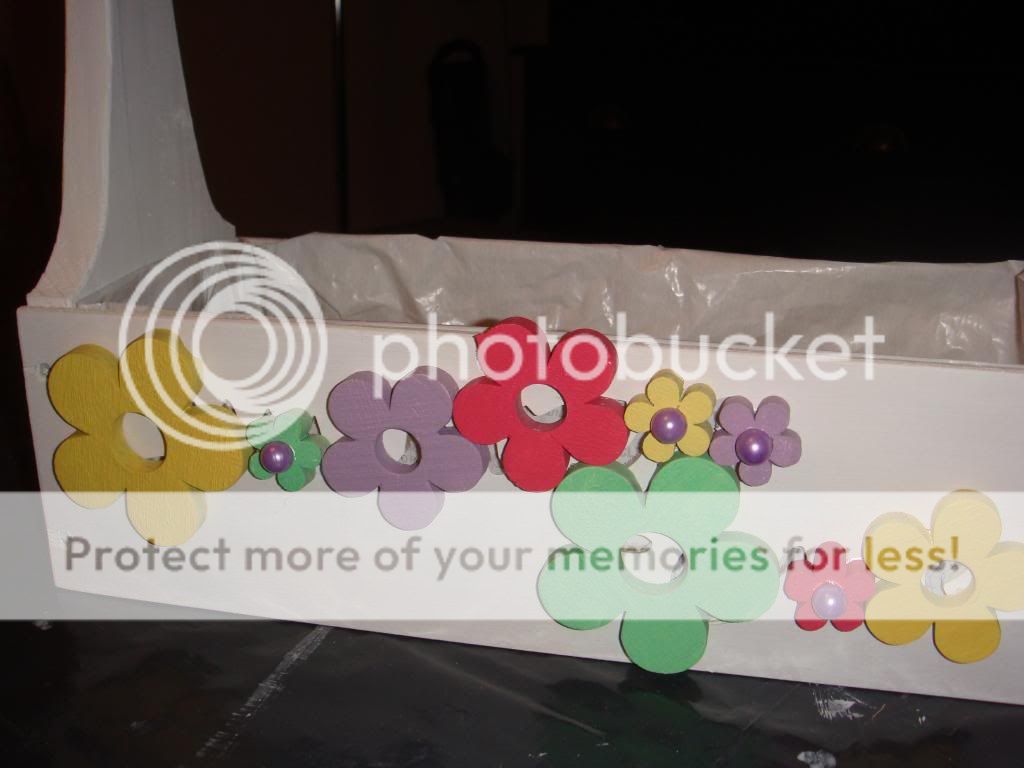
Finally I can show you my Craft Challenge for February! I decided to re-purpose a crate which was a beer gift package. Since it just simple rough wood, it was pretty simple to paint it, pimp it and turn it into a flower basket!


Let's start by showing you the before picture and what I used to transform it into something else.

1) The before:

 2) What do you need:

You will need: Glue gun, paint brushes, wooden flowers to cover the words "Limburgs Genot", and I used some plastic beads.
You will also need paint, good white paint as a base coat and some colored paint. I used Acrylic paint (the cheapest I could find). I thought I would also need nails and a hammer to fasten the plastic lining but instead I used (wood) glue. I like my glue!

 3) Start painting:

Make sure to apply enough white base paint, I had to paint the crate 3x to get it really white. Then apply some stripes if you want to, you can also add polka dots or anything you want really... When painting stripes make sure you use tape to get nice straight stripes. And wait with taking of the tape until the paint is really dry.
When painting these wooden flowers, also first apply a white paint (2x) and then when it is completely dry apply some nice colors to the flowers.   

 4) When everything is dry:

Cover the inside with some (thick) plastic to make sure it is water resistant when watering the plants/flowers.

 5) Start gluing!

Now you can start gluing the flowers to the flowers to the outside of the crate. I also added some plastic beads to the smallest flowers.

 6) Finishing touch!

Add some plants! I choose for
hyacinths because they smell so nice!

Now go over to Craftbotic and vote for your favorite Re purposed craft!


post signature

Thursday, 17 January 2013

2013 Craft(botic) Challenge

A Challenge?! Yes that is that the title of this post is! And this challenge sound pretty awesome! If you are a regular reader you might know that I am not that good at sticking to challenges.... I once tried the photo-a-day challenge... during which you had to take a photo of an item (which was mentioned on the blog) and post it.... half way the month I forgot to take the pics... and I just stopped.... If you also remember I said I would participate with the weekly OH, How Pinteresting item... couldn't keep up with this either...

But a new year has started so it is time to make new resolutions right?! The thing about this challenge if that you only have to do 1 item per month! So you have 4 weeks and weekends to make something. And I like making things and think of making things.... to sit behind my sewing machine and see how you create something. So will I keep up... I think so!

This is what the challenge consists of:


So for January we have to make something of leftovers! And boy do I have leftovers... My first thought was to use my fabric leftovers, but of course you can use anything you like; paper, flowers, fabric, wood, food! Anything you like!

And here is the first item of the challenge: I made a Tissue Case! I did use a tutorial so I am not sure if that is cheating... so please don't Rosie from Craftbotic the host of this challenge! The tutorial I used is from Very Purple Person. And to be honest I quite like the result! It is very easy to make, useful and you don't need a lot of fabric.

Well if you want to join in on the fun, it is easy! No signing up, just crafting!

Signature to use

Friday, 14 December 2012

Crafts & Christmas part II

Here is the deal on the Cocalores Tutorial I "followed".

So I am going to be a bit lazy and only post pictures of the end result and for the complete tutorial I would advise you to click HERE.

My end result:


Ok... so I am pretty happy with the end result, but to be honest I think I might add some more balls because I think there is still much white of the Styrofoam peeking through..... Will do that this week!

So what did this DIY project cost me: about € 15, that is including the balls, the Styrofoam and glue gun (which I bought at a craft store). Of course this is excluding the additional balls that I need to buy to perfect this piece.

If you also have some Cute Handmade (Christmas) Gifts you can upload them HERE!

Have fun!!!!
Signature to use

Wednesday, 12 December 2012

Crafts & Christmas


Crafts and Christmas are always a good combination! And this weekend I had such a creative weekend! Pfff I can't even believe it myself.

What did I do this weekend:

1) transformed my lovely Magnolia branches from a summer piece to a Christmas piece.


Before
After
I still had a voucher of a garden center where there is a huge Christmas market each year! The deal on the voucher was that is cost € 10 but was worth € 20! So I bought some items to make my perfect Christmas piece! I also found some old items (that happened to be red and purple) and voila!

So here we go! What do you need:
- some branches, I used these Magnolia branches that I already had but pine branches would also be a good option
- a nice vase
- some silk or real flowers and Christmas ornaments.
- clip on flowers
- berry branches
- stars
-Christmas balls
- Orchids
- beaded pendulum
- small ribbons
- candle holder
- some voile or large ribbon in order to make sure there is no gab between the vase and decoration. So basically you use it as stuffing...
- and you will need some Styrofoam or floral foam to fasten everything

How to start:

1) put the foam in the vase, quantity depending on the diameter of the vase
 
2)cover the vase with voile (I laid the branches on top of the vase instead of putting them into the foam. If you want to put the branches vertical you will need to fasten them into the foam and therefore cover the vase with voile at the end)


3)wrap the beaded pendulum around the branches

 
4) fasten the flowers and berry branches


5) Once you have done this you can start adding the other ornaments and 
ribbons for the final touch! (An other nice idea is to wrap some yarn/threat around the branches, the rougher the yarn the cooler. This was also use in the "before" picture).


Well basically this is it! Most important is that you make a plan before you start and buy the ornaments based on your plan, and once you start it is pretty easy!

  2) I made this super cool Christmas ornament for which I used the tutorial from Cocalores! Below a preview, the complete post will follow later this week.


3) On Sunday I made a lovely top! The complete story will follow in another post but below an idea of the top I made.


Stay tuned for the whole deal! See you soon!

Signature to use